E-PORTFOLIO TIP OF THE MONTH:
Adding Sub-Menus
As you get involved and exposed to various types of experiences, you will have more things to write about and post on your e-portfolio! A common issue students make, is having too many top-level menu items. This tends to look cluttered and disorganized.
Using sub-menus is a great way to solve this problem! You can easily keep your e-portfolio simple and organized by displaying only the key highlights of your profile. For example, you can categorize the different pages you have into several distinct categories instead of displaying all of those pages in the top-level menus.
So instead of this:
You will have this:
And you can do it in just a few simple steps.
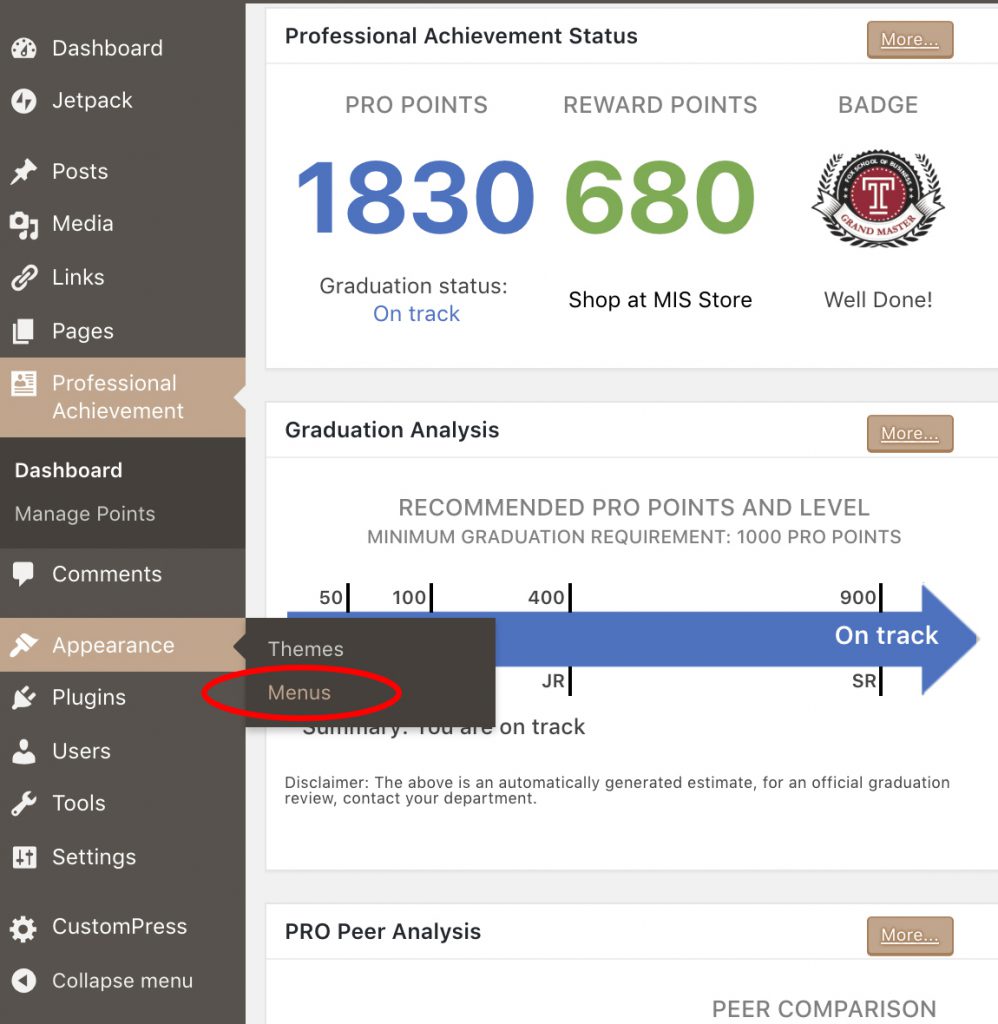
Step 1: In your dashboard, go to “Appearance” → “Menus”

Step 2: Go to “Manage Locations,” and choose a menu (eg. “Menu 1”) from the drop down. Click “Save Changes.”
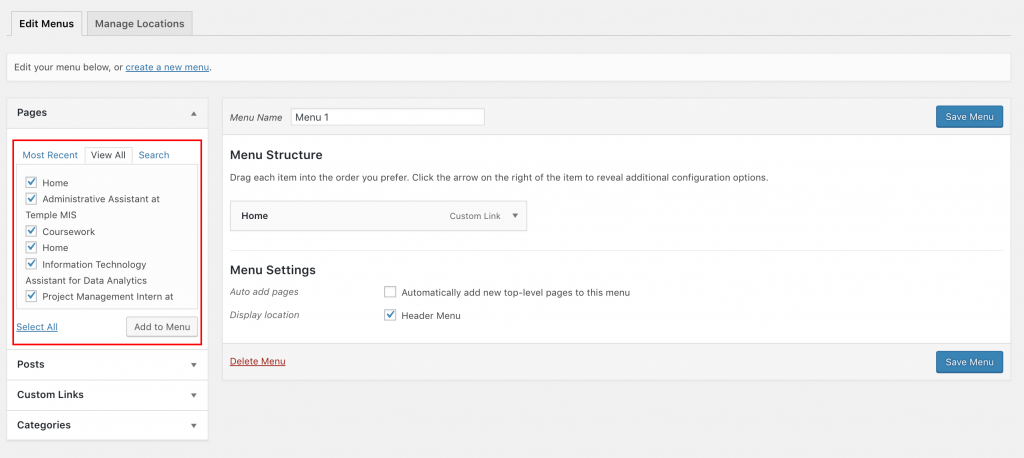
Step 3: Go back to “Edit Menus.” Before creating sub menus, select the menu items that you want to display by marking the check box under “Pages” and click “Add to Menu.”

You should see the menu items that you just added under “Menu Structure.” You can also drag the items up and down to organize the order of the menus.
Step 4: To create sub menus, drag the item that you want to make into a sub menu inwards (to the right). It should say “sub item.”
When you’re done, hit “Save Menu”
Step 5: Go to your e-portfolio and check out that new look!
Keep an eye on your inbox for the next tip!
If you have any thoughts or suggestions on tips that you’d like to see in the future, please let us know here.

Leave a Reply